How to Install an Electric Sub Meter
Landlords with tenants should contact their electrician for advice. Our
Prepaid sub meters are available from selected electrical wholesalers and hardware stores across the USA. Ensure that the meter you buy is MID-certified and STS-compliant.
If the property has been wired correctly, with each section on its own circuit, installing a sub-meter is relatively straightforward, as there is a wiring diagram packed in the box.

When installing an Electric Sub Meter REMEMBER TO:
- Switch off the main circuit breaker.
- Locate & record the CT number on the back of the meter.
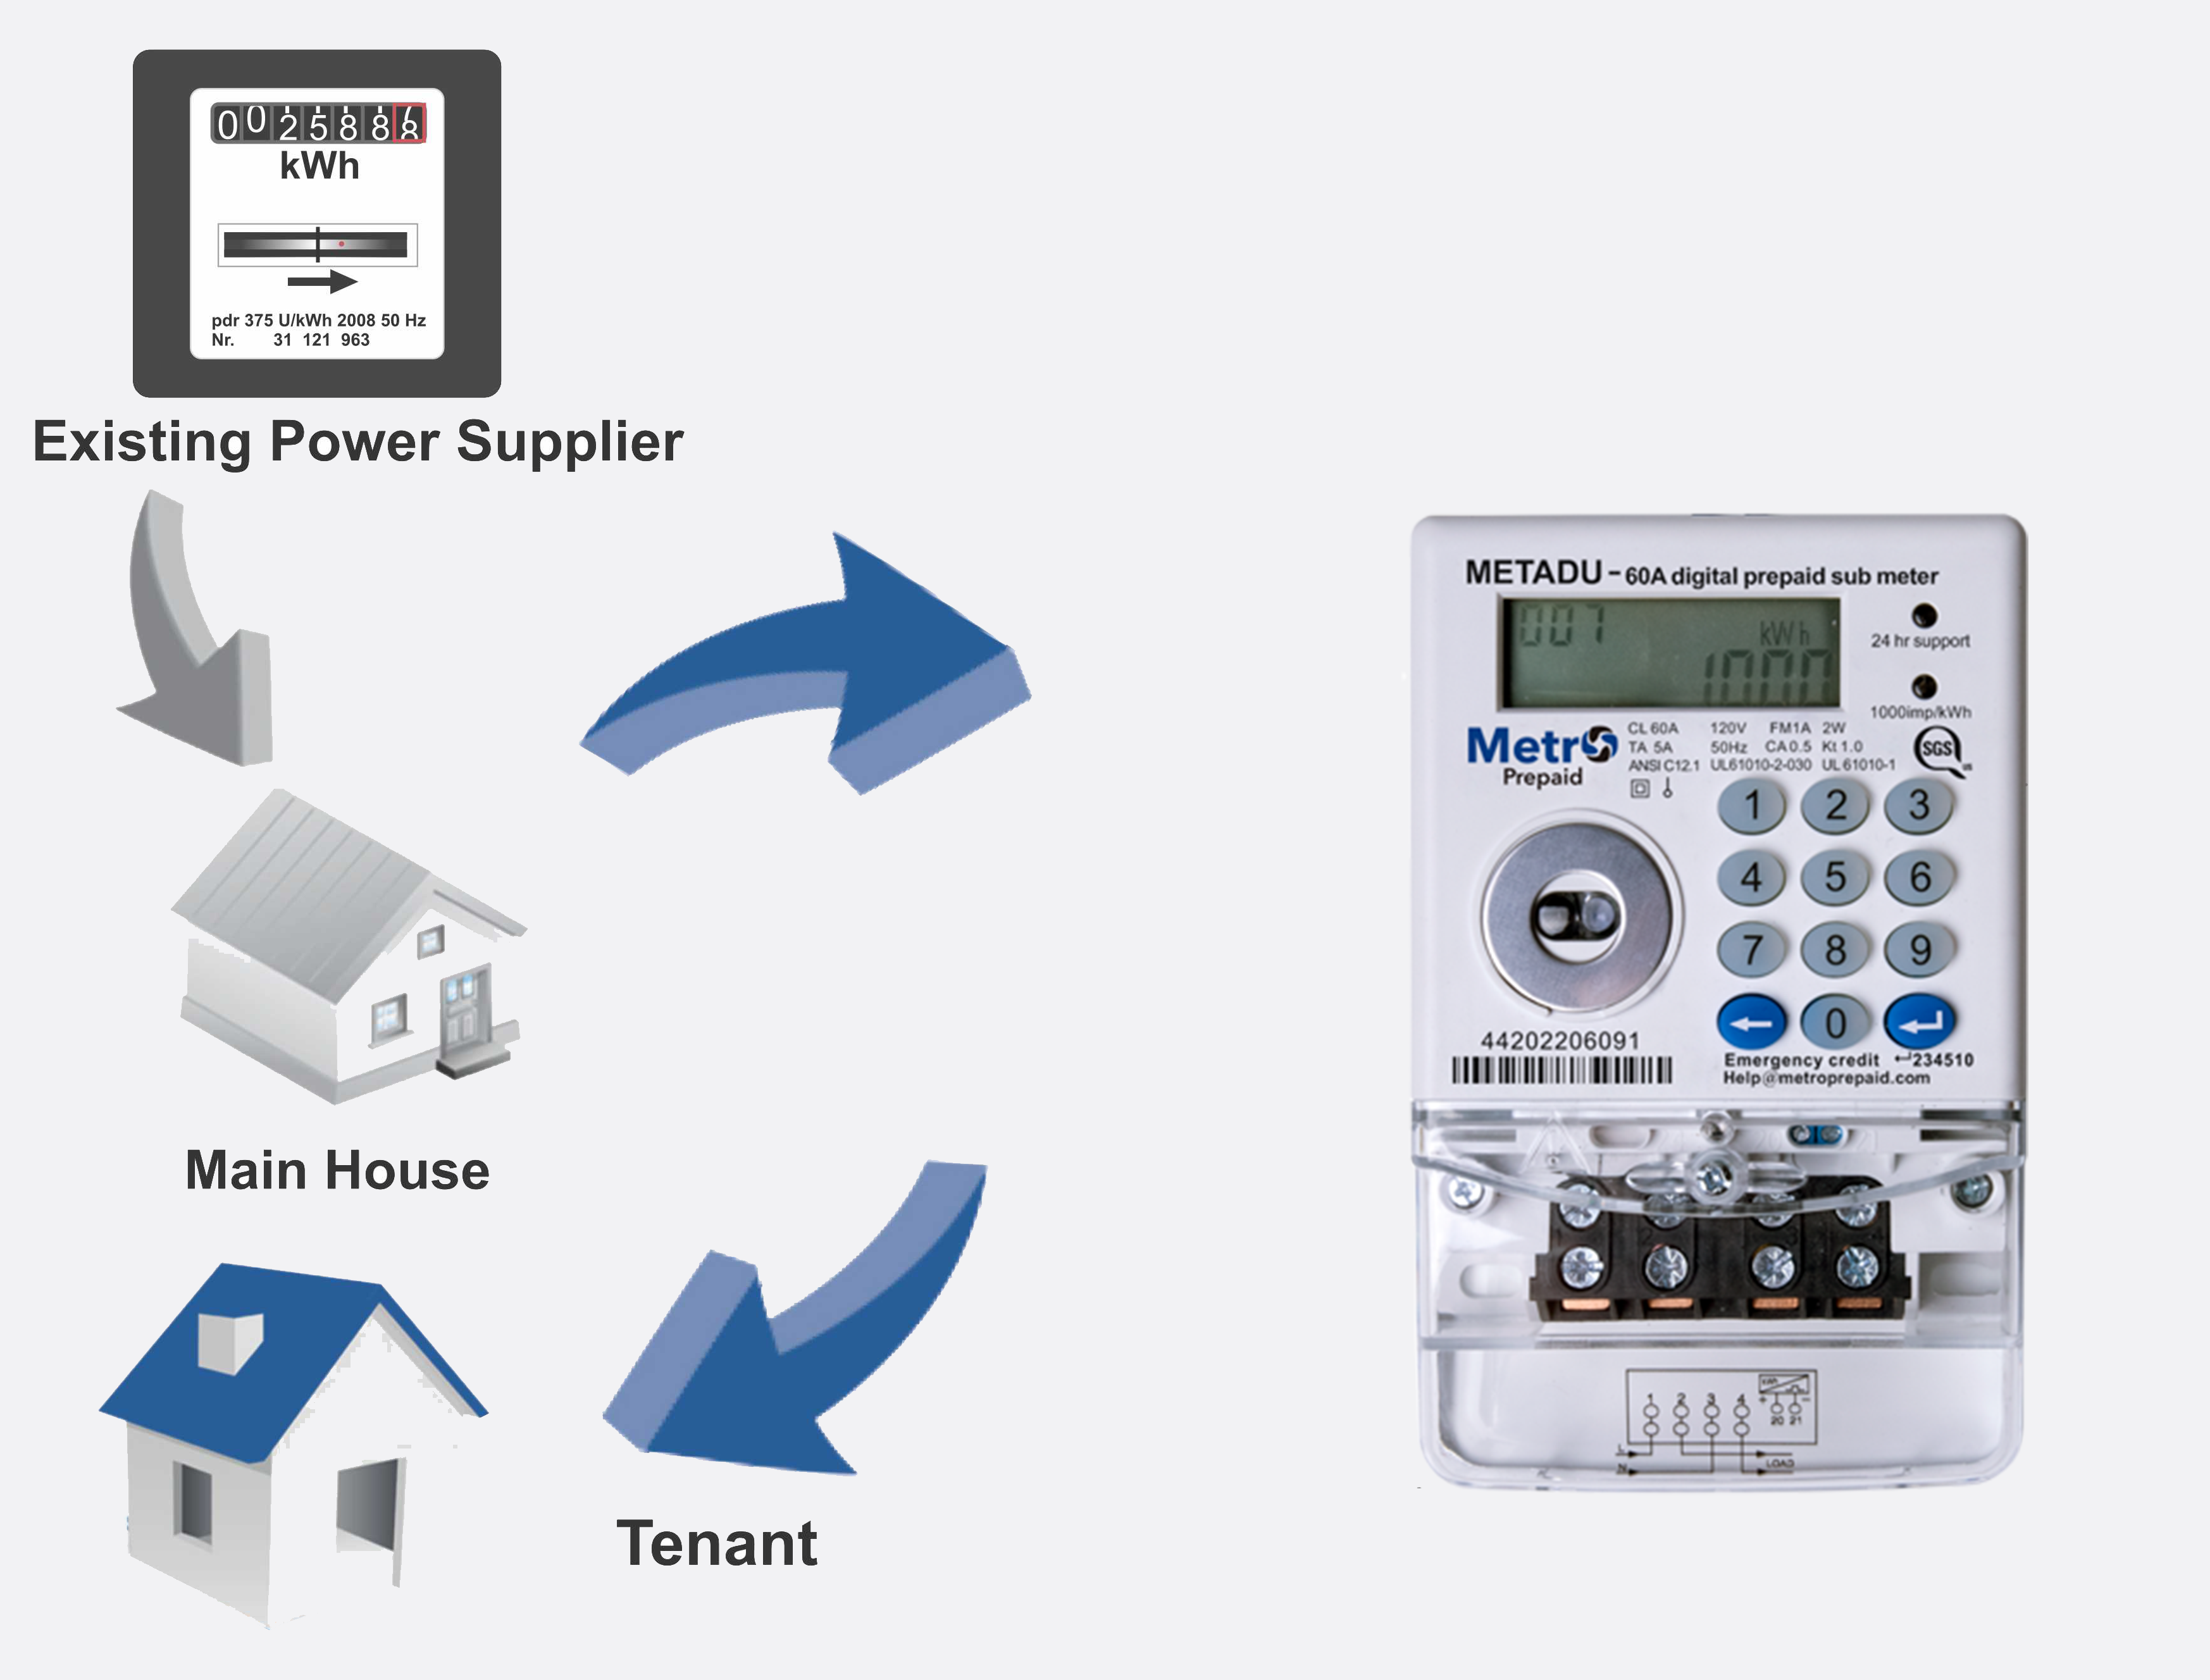
- Install the sub meter downstream of the main meter from the Energy Provider.
- Each sub-metered apartment needs its own circuit connected from a separate breaker on the main distribution board.
- Protect the sub meter with an RCD and overload protection.
- The sub meter will regulate power supply to the apartment’s sub-distribution board.
- The sub-distribution board powers the circuit in the apartment.
- Connect the live in and live out and neutral in and neutral out.
- Make sure connections are secure.
- Replace the anti-tamper cover.
- Secure the cover with a unique seal.
- Switch on your main circuit breaker.
- Do not open the anti-tamper cover once the power is restored.
- Enter the CT code and press ↵.
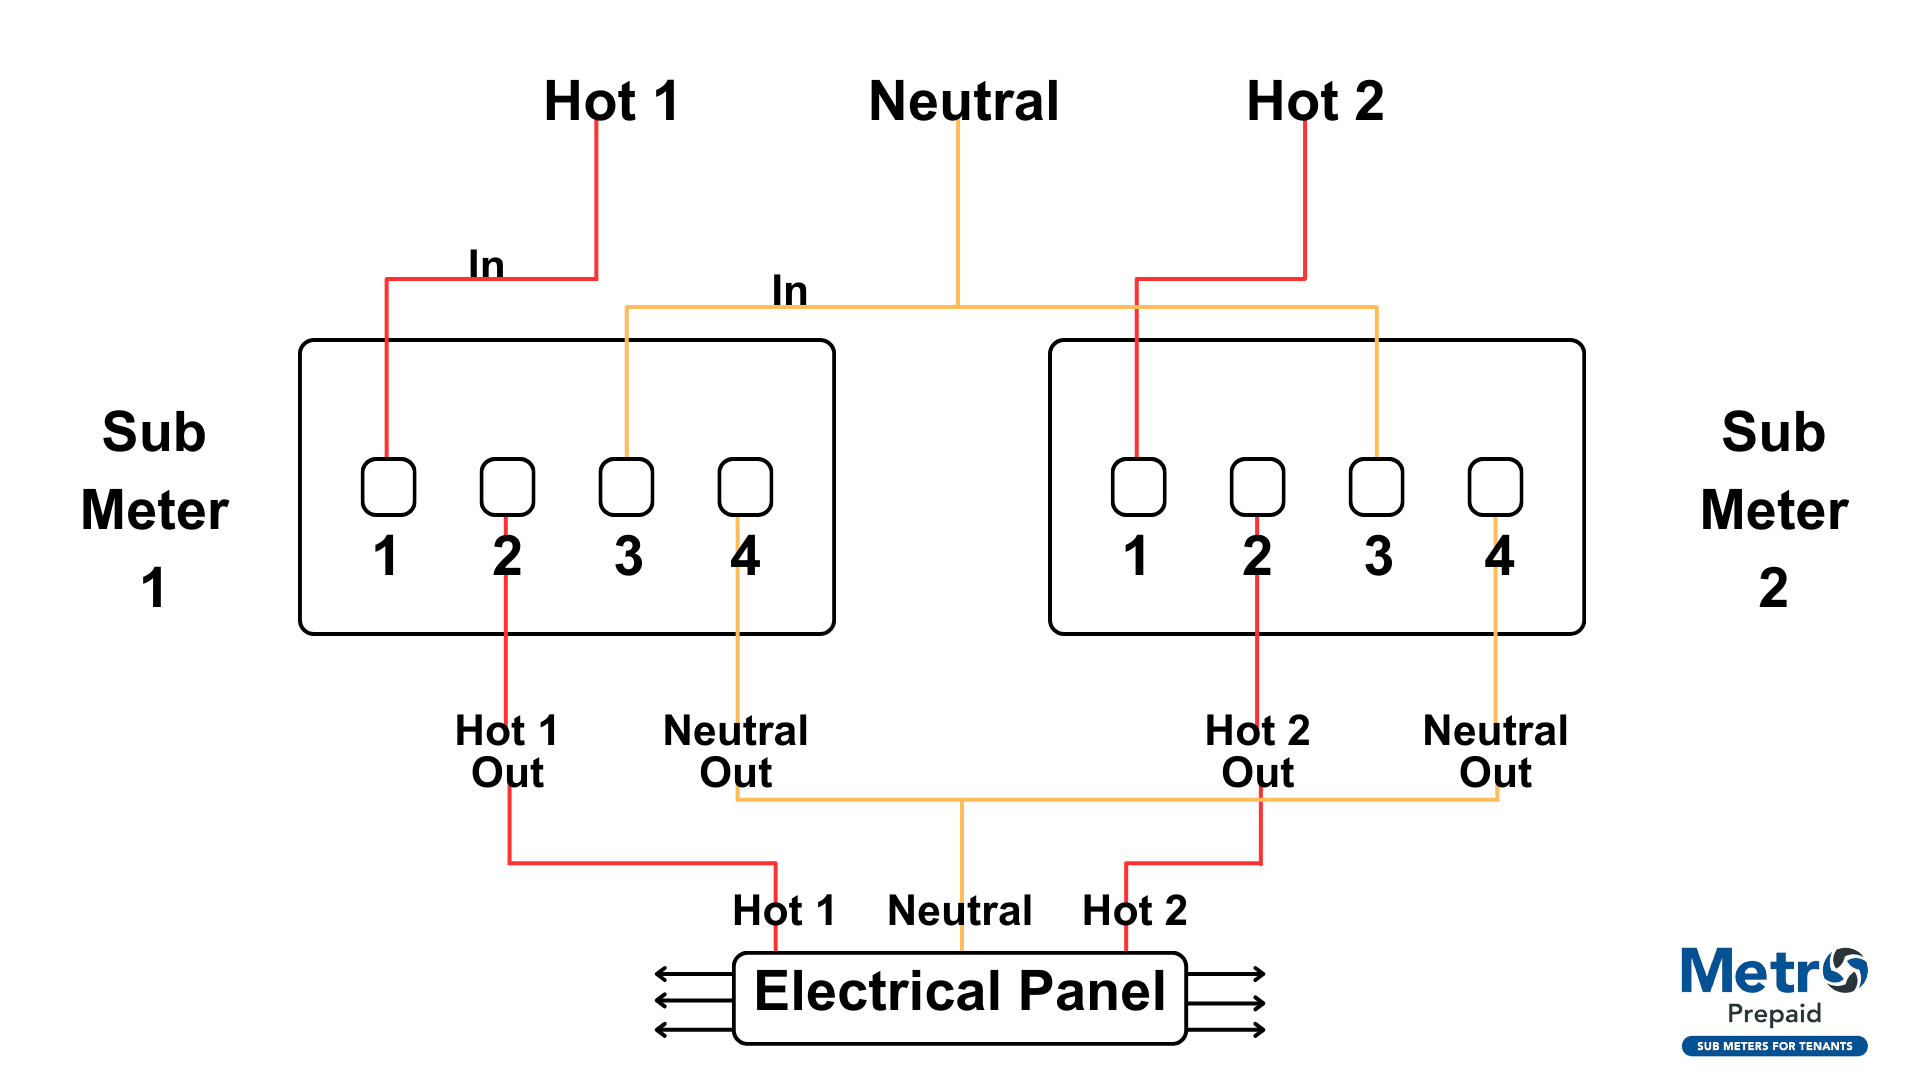
How to install two electric sub meters in one ADU

Step 1: Turn off the main power at the electrical panel to ensure safety while working.
Step 2: Remove the covers from both sub meters by unscrewing them, then set them aside.
Step 3: Take the Hot 1 wire (usually red or brown) from the electrical panel and screw it into terminal 1 of Sub Meter 1. Make sure it’s secured tightly.
Step 4: Take the Neutral wire (usually blue) from the panel and connect it to terminal 3 of Sub Meter 1. Tighten the screw to secure the wire.
Step 5: Now connect a second wire to terminal 2 of Sub Meter 1, which will be the Hot 1 Out wire going back to the unit. Ensure this wire is firmly secured by tightening the screw.
Step 6: Connect the Neutral Out wire to terminal 4 of Sub Meter 1 and tighten it to make sure it’s fixed properly.
Step 7: Repeat the same process for Sub Meter 2. Connect the Hot 2 wire from the electrical panel to terminal 1 of Sub Meter 2 and secure it tightly.
Step 8: Take the same Neutral wire you used for Sub Meter 1 and connect it to terminal 3 of Sub Meter 2. Screw it in securely.
Step 9: Connect a second wire to terminal 2 of Sub Meter 2 as the Hot 2 Out wire, ensuring it’s tightly in place.
Step 10: Finally, connect the Neutral Out wire to terminal 4 of Sub Meter 2 and screw it in properly.
Step 11: After all connections are secure, put the covers back on the sub meters, turn the power back on at the main electrical panel, and test the meters to ensure they’re working.

Where to buy your Metro Prepaid Electric Sub Meter?
Metro Prepaid electric sub meters are available online or from various electrical wholesalers across the USA. Please visit our products page to see our electric sub meter.